November Block of the Month
Local traffic is getting heavy, the stores are getting crowded and it’s getting dark much earlier. That can only mean one thing, it’s November in South Florida and the holidays are on us!
This month's block is a holiday theme in a festive way.
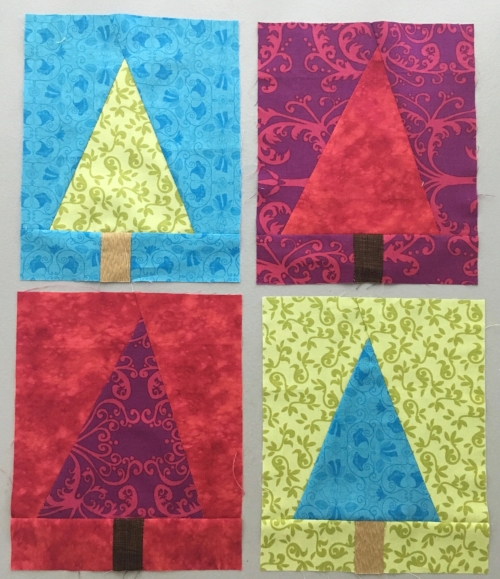
Our block is a kinda sorta improv in bright colors! The best resource for making these blocks can be found at Amy Smart’s blog, Diary of a Quilter. The link for the tutorial is here.
If you’re on Instagram (And if not, why aren’t you?!? Loads of great inspiration everywhere!) search #holidaypatchworkforest . The ideas for mini quilts as well as full size are boundless. AND if you ARE on Instagram, check out @sterlingquiltco . She has a tutorial right there on Instagram of a lap quilt of the Patchwork Trees that uses just one layer cake. Hers is a Haunted Forest Quilt but the idea works for any layer cake.
Use any bright colors that strike your fancy! The tutorial creates two blocks at once. My samples show tone on tone but yours don’t need to. It’s just what I used to make my blocks.
For a quick ‘how to’ you’ll need:
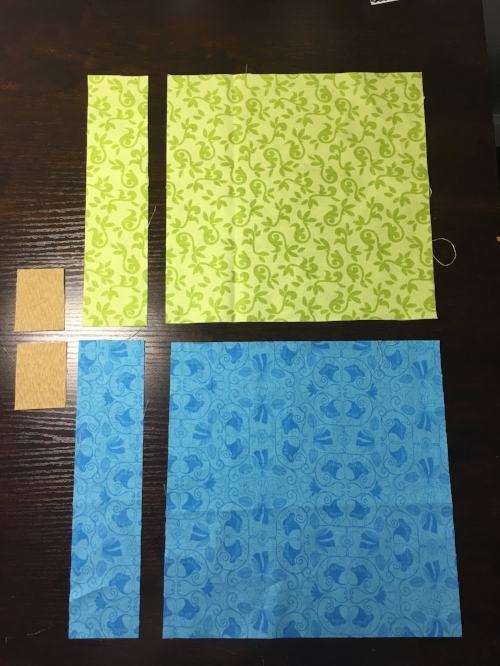
- Two squares 8.5” x 8.5” - these will make most of the trees and background
- Two strips 2” x 8.5 - these make the base of the tree with the trunk
- Two brown rectangles 1.5” x 2”- these are the trunks
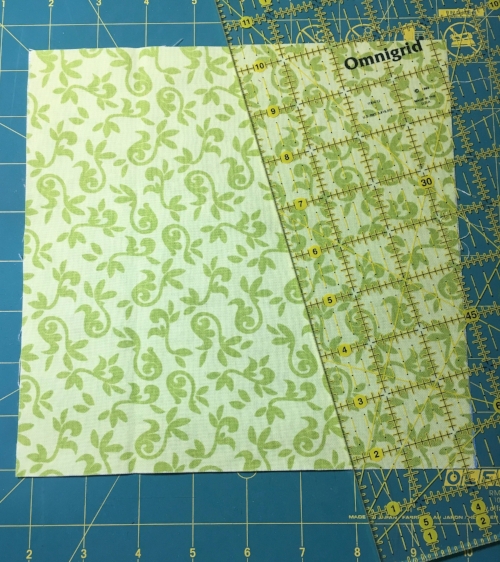
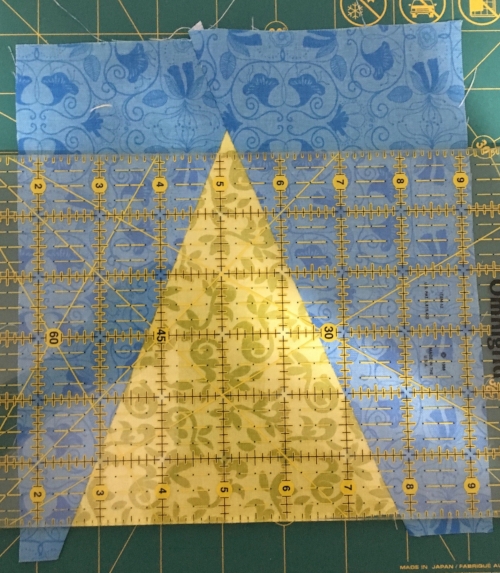
- Stack the two squares and make a diagonal cut from top to bottom on the right side
- Remove the right stack and make another diagonal cut top to bottom on the left side
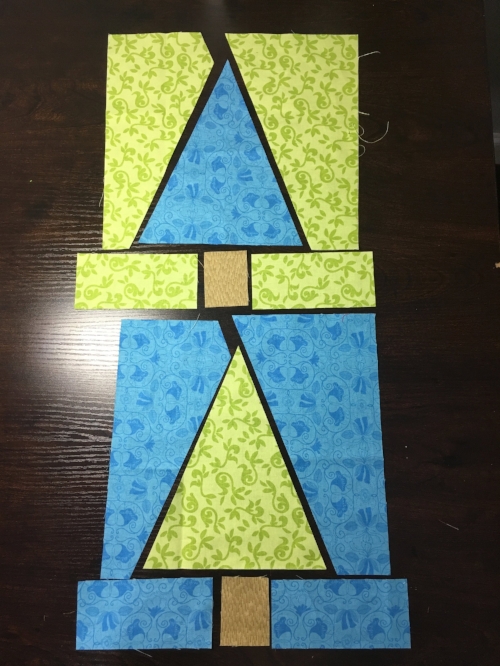
- Cut the two 2” strips into two pieces of 2 x 4.25” each
- Swap the tree pieces so you have contrasting trees with backgrounds
- Sew the tree to the left side of the background, press it and add the second side
- Once the block is pressed, trim the bottom even.
- Make the trunk by sewing the two 2 x 4.25” pieces to either side of the brown rectangles
- Now, finish the block by sewing the trunk to the tree
The trees can be as wonky as you please. The block should finish at 9.5" x 7.5".